

My Mom wasn’t a crafty person, so I taught myself to sew when I was in seventh grade. As a result, I didn’t know how to do some of the fundamental things that you pick up when you learn to sew from someone knowledgeable, like in a home economics class or from an experienced elder.
One thing that often had me flummoxed were the instructions “stitch up the opening.” I’d have just made something that required sewing and turning, like in my Flannel Baby Receiving Blanket Tutorial, and I just hadn’t learned how to do that and have it look decent. I am embarrassed to say that as an adult I started to just avoid those kinds of projects because I didn’t want to make something that looked wonky on that finish detail.
Thankfully, in the mid-2000’s, when I learned to hand-bind a quilt, I finally learned the secret to closing up these types of openings: the Ladder Stitch (also known as the “invisible stitch” because once the seam is closed it’s invisible!). It’s perfect for closing seams after turning, attaching the edge of the binding to the back of the quilt, joining English Paper Piecing, or any time you want to sew a long straight seam where you only have access to the front of the seam and not the back. It’s genius, and it looks fantastic.
I want to make sure that you have this stitch in your arsenal so you won’t have to wonder like I did. Here’s how you do it:
Step 1: Gather Supplies

For this stitch, you just need:
-
Thread
-
A needle
-
Your project
The type of needle you’ll want depends on the project, but basically you want something that’s longish and not too thick, but with an eye that won’t make you crazy trying to thread it. When I photographed this tutorial, the only needle I could find was a short, stubby hand-quilting needle so that’s what I used. It was a little too short to be easy, but it worked just fine.
For thread you just use whatever thread you’re using for your project. Since I primarily quilt and sew with 100% cotton fabric, I like to use a 100% cotton thread such as Aurafil.
Step 2: Press Raw Edges In

Before you start stitching you need to make sure you have clean edges. Press your edges in along the opening so they are straight in line with the previously sewed seams.
Step 3: Knot and Start
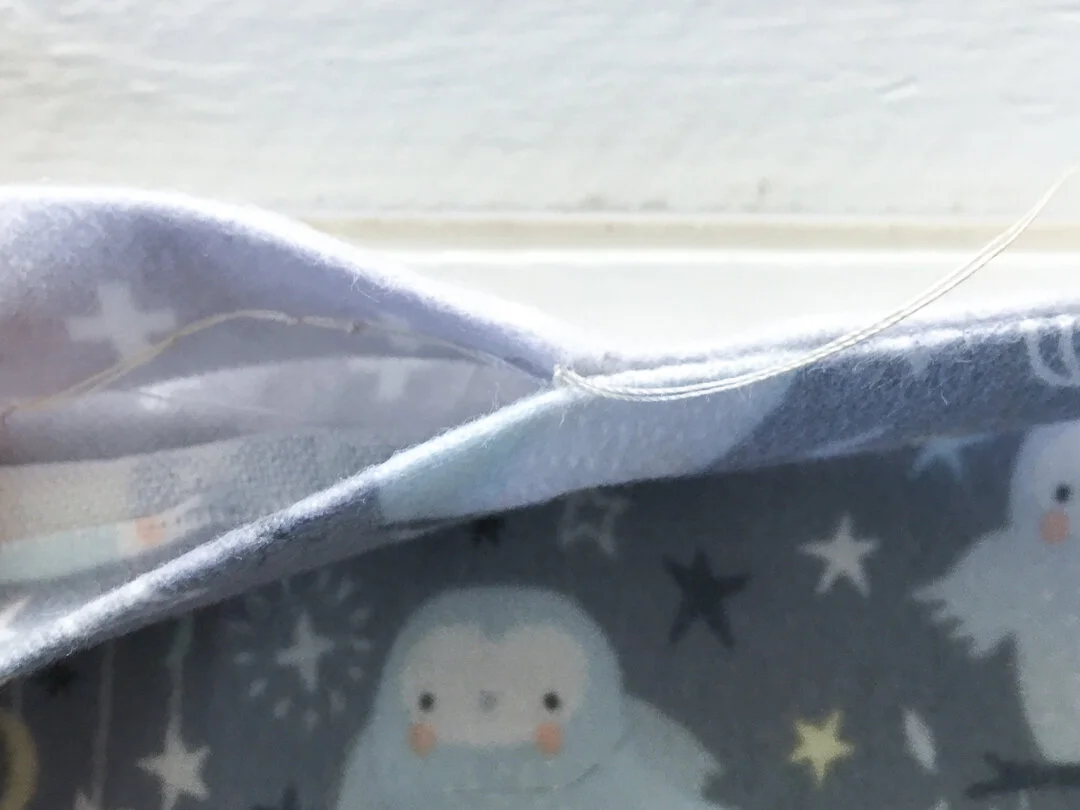
Next, thread your needle, pull the end down so you have a double strand and knot the ends together. Take a stitch on the inside flap of fabric where it won’t show to secure the thread. Make sure not to catch the face of the fabric on the outside. Take a second stitch through the flap (again, not through the face, just the inside flap), and come up through the folded edge right at the point where the stitched seam ends. Pull through. You should see the double strand of thread emerging from the knife edge of the folded fabric right next to the beginning of the opening as shown above.
Step 4: First Stitch

Take your first stitch. Take your stitch along the top of the knife edge of the folded fabric as above. Pull through.
Step 5: Second Stitch

Next, take your second stitch through the opposite side. Try to line up your stitch so that it begins directly across from where the other stitch ends.
Step 6: Continue Stitching


Continue along, taking stitches on either side of the opening, lining up each stitch to begin directly across from where the other one ends.
Step 7: Check for the “Ladder”

As you continue to stitch, you will see the “ladder” of stitches forming down the seam as shown above.
Step 8: Pull Taut

Every few stitches, pull the thread taut to close the opening and hide the stitches. Don’t pull so tight that the seam wrinkles up, just taut enough so the stitches disappear as shown above.
Step 9: Finish
Continue stitching to the end and tie off your stitching with a knot. Bury your end and you’re done!

Congratulations!
You have now learned the Ladder Stitch!! I hope it comes in handy. Now that I know this stitch I use it all the time. Some of my favorite uses for it are:
-
Finishing a turned blanket such as in my Flannel Baby Receiving Blanket Tutorial
-
Finishing a turned bag or purse
-
Finishing quilt bindings
-
Joining items like yo-yos or hexies
-
Whenever a seam needs to be closed from the “front” rather than the “back”
If this was helpful or you make something, let me know! Comment below or come on over to Facebook or Instagram. Either way, let me know if you give it a try!
Happy Stitching!

Leave a Reply