I have to be honest, I’m not sure that those indoor planters that so many 50’s-era ranch houses have were ever a good idea. They’re never in a spot with good light. They’re never in a spot that’s great to water in. They’re permanent, so you can’t just dump them out when they get yucky. So yeah, not my cup of tea.
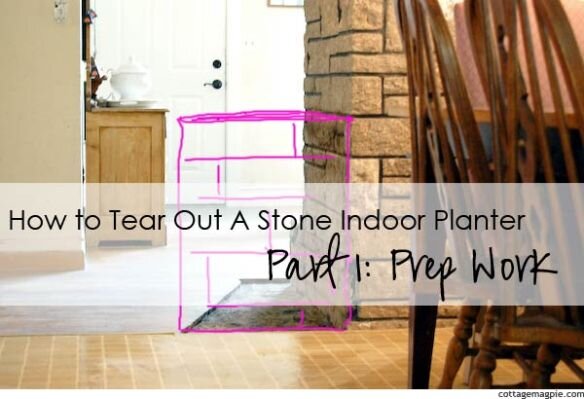
Even worse, is when you have one (like mine) that’s been built right in the middle of your walkway! Then it’s just wrong.
There’s only one solution to this gripping dilemma.
DEMO.
Planter Box Removed

Fireplace Stone
Prep Work
Before I did anything, I did a little investigating. Although it’s true, I am given to jumping first and asking questions later, this was unfamiliar enough that I thought I’d better do my legwork this time. First of all, I wanted to make sure that the stone wall wasn’t structural. I figured the planter box wasn’t because it wasn’t holding anything up. But what about the rest of the wall? If I pounded on the planter, could I somehow damage the main wall? And if so, would that be a serious problem? Fortunately my Dad is a Civil Engineer (as well as an inveterate DIY enthusiast, so I got his advice.
Of course, this meant I also had to deal with the prelude to the information, mostly along the lines of, “You want to do WHAT?”
Dad assured me it that the wall was purely decorative. In fact, he said, the stone itself wasn’t actually stone, but made of concrete with some natural pumice filler to make it lighter. My stone wall is totally fake! It’s still reasonably heavy, but it’s not as heavy as stone, which meant I’d be able to move the stones if I were able to get them loose! It also meant that I would likely not hurt myself or break something shifting them around. Very important.
Okay, so, knowing that I would (a) not likely injure myself (unless I did something really stupid), or (b) knock my house down, then I figured I was okay to continue exploring this idea.
The next thing I did was take a good look at how the box was put together. Stonework is kind of like a big puzzle, and I wanted to make sure I could take part of the puzzle off without wrecking the whole thing. I mean, I was fine with a bit of patchwork here and there, and I was fine with covering part of it up with bead-board or something. But I didn’t want to have to completely disassemble the whole fireplace just to get the planter box off.
Fortunately, whoever built it must have predicted the future, because it was connected for the most part with one big seam (it was the same on the front).

Stone Planter Box
There was a bit at the bottom that wasn’t quite in line, but I figured I could always patch that or cover it with a big baseboard or something decorative.
Finally, I emptied out the planter box. I wanted to see what was IN there!
The kids and I worked on it off and on for several weeks. It was very dusty, so we set up fans in the windows and then we dug the dirt out with little shovels and put it in bags and put it in the trash. It was so dry and full of junk it wasn’t worth saving.
Once it was (mostly) empty, I knew three more things.
1. That the fireplace wall was faced with stone all the way down. I would have done the demo either way, but I would have had a bigger patch/cover job at the end. This way I could pull the box off and just be done with it.

Stone Planter Box
2. The box was open all the way down to the bottom. In other words, not filled with concrete or something nuts that would have required jackhammers or the equivalent.
3. That there WAS a bottom, somewhere down around the floor. I couldn’t get all the debris out easily, so I didn’t know exactly what was at the bottom, but I knew that it had one. So, not open to the basement or something else that would have made it more difficult.
Not that any of those things would have stopped me…. eventually. I just might have had to wait longer to get on with it.
So. Once I had decided that this was (a) possible, and (b) feasible, I was ready to actually get to work. You know what that means… Demo, Baby!

Tools
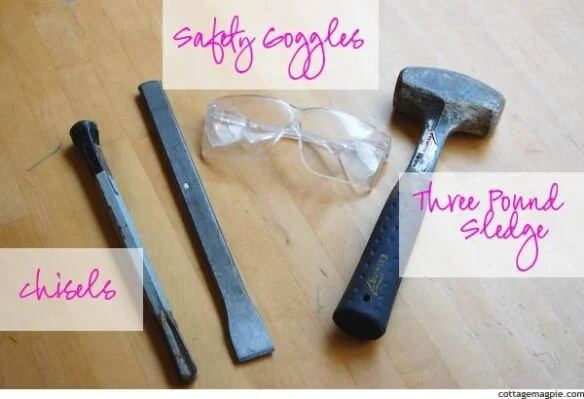
My basic plan was to try and just chisel out the mortar between the stones and take it apart piece by piece. I didn’t want to swing a full-sized sledgehammer inside the house. Not only do sledgehammers and kids not mix (YIKES), I didn’t want to send junk flying everywhere or risk hitting the other parts of the wall.I thought I could just get the stones out one at a time and keep it simple, safe and relatively tidy. So, I only needed a few basic tools.
Most important, of course, were the safety goggles. I knew there might be bits of (fake) stone, mortar or who knows what else flying through the air, and I didn’t want any of it in my eyes. Any other people who were in the room with me also had to wear safety goggles.
This project wasn’t particularly loud, but if it had been, I would have also worn ear protection. Beyond that I figured I’d just need some chisels and the three pound sledgehammer. I didn’t know what exactly would work so I grabbed what we had. As it turns out, I only used one chisel, the one on the right, the flat one. That one is called a “cold chisel.” According to the internet, it is designed to be used with metalworking, whereas the ones designed for masonry are much wider. Well, this is the one we happened to have in the house and it worked just fine. Great, in fact.
The three pound sledgehammer is a very useful tool, one we’ve had for years and we use a LOT. It’s heavy enough to do some good work, but small so you can keep control of it.
Demo
Okay, so. I started by trying to peel off the slate on the top layer. I just put the flat part of the chisel into the mortar underneath a piece and gave it a few whacks with the hammer. I didn’t hit it all that hard. My Dad always taught me that it’s the hammer’s job to do the work, you just aim it. So I did that, and the stones popped right up.

Once the top layer was off, I started looking for the easiest place to dissassemble the puzzle. I figured it’d be easiest to take out a stone that only had one end mortared in instead of both, so I found a stone that was exposed on the end, like this one on the corner.


Then I just did the same thing with the chisel. With the bigger stones I might have to pound on it in a couple of places, but generally the mortar broke apart and then I could just lift the stones right off.
You notice I’m picking that up with one hand. That’s because those stones are light. It only weighed as much as, say, a couple of big books, not like a rock. If it was real stone I would have had to use both hands and been more careful.
As soon as I lifted off a stone, I would find the next stone that seemed the easiest and go after it the same way.

I just kept doing that until I got down to where there wasn’t any more mortar that I could get to with the chisel. It was surprisingly quick. My husband had thought I’d be at it for days, but we got the whole project done, including clean-up, in about two hours.
Next, the final row and clean up.

Though it seems daunting (which is why we put it off for so long), it turned out to be a fast and easy project. But a big portion of that was sheer luck. This planter really was built in a way that made it easy to get rid of it. I have no idea if that’s common or not, so it’s something to look at if you want to rip out one of your own.
That Last Row
Once we got all the main walls out, we ended up with one last row at the bottom that we couldn’t chisel out because the level of the mortar was under the level of the wood floor. Once we got there, we had to pound on the inside of the stone with the sledgehammer until they came loose.

Uhhh…. you’re not really supposed to work on projects like this in sock feet. So, you can pretend you didn’t see mine. Ooops.
Once we got that last row out, we had to work on the front of the fireplace, where the hearth is. I didn’t want to have a really sharp corner there, so we used the chisel to chip away some sections and make a “clipped” corner. (By “we” I mean “Mr. Magpie” as you can see.)

As we worked, we tried to knock all the mortar off the stones and then stack them up to be taken out to the garden and (hopefully) used for something out there.
Clean Up
Once all the stones are out, there’s nothing to do but start cleaning up the mess! With all the big hunks of debris, the easiest thing to do is use a flat shovel and literally shovel out your house!

We put it all in bags and then loaded it into the car and took it to the dump. Our local landfill takes “clean” debris such as rocks, bricks and mortar for free. Sadly, it can’t really be reused for anything. We salvaged all the stones, though, to be reused.
When we did finally get to the bottom, we found, to our extreme relief, a smooth, level, concrete area. It was leveled off exactly at the level of the sub-flooring. Again, I have to wonder if someone along the way knew this planter box was going to go away eventually. It’s set up perfectly for us to patch the floor and have a seamless end result.
There was some old splats (that’s a technical term (not really)) of mortar on it, but Mr. Magpie hit them with the chisel and they popped right up.

(That’s right, folks, I start the projects, he finishes them. Heh. I should probably be nicer to him, huh?)
After that and a quick vacuum, we had ourselves a nice, wide new place to walk through the middle of our house.

I think that says it all. 🙂
The funny part is that once we decided to actually start the demo, the whole project took about two hours, start to finish, including clean up. That’s it! After we were done, Mr. Magpie said, “I can’t believe we waited so long to do that, it was easy!”
You’d think he’d listen to me more. Hee hee.

YOU MAY ALSO LIKE:


![]()


Leave a Reply